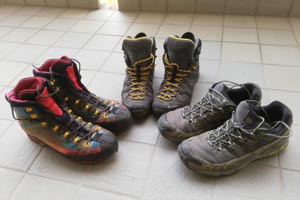
Tips for a smart purchase
Trekking poles have become essential hiking gear for outdoor enthusiasts. Their primary benefit? Trekking poles reduce strain on your joints, helping you conserve energy on the trail. Uneven terrain can overload your legs, putting extra stress on muscles and joints. By using trekking poles, you shift some of that effort to your arms and shoulders, easing the load.
For multi-day hikes with a heavy backpack, trekking poles are even more valuable. They improve your balance and stability, protecting your joints and making long hikes more comfortable.
Let’s know better all the elements to consider in order to buy this gear.

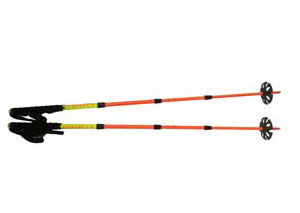
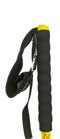
Handle: An element not to be underestimated. It is better to choose it with a soft material that does not cause blisters or calluses while hard use. Many sticks have a coating extension similar to the handle, this is useful when, uphill for example, we have to place the trekking poles far above us preventing us from holding them at the top with a awkard position.
Adjustment and Locking System: Telescopic hiking poles can be adjusted in length to suit your height and specific needs. To find the correct height, grasp the handle and position the pole perpendicular to the ground. If your elbow form a 90° angle, this is the ideal height.
There are two main locking systems to secure the pole sections: internal twist lock and lever lock. The twist lock, the more common and budget-friendly option, works with a threaded mechanism inside each pole section. By twisting, you expand a small helical brake that locks the pole in place. The lever lock, on the other hand, uses a collar with a screw and lever similar to those on bicycle seat posts. This system offers greater stability and durability over time, making it a popular choice among experienced hikers.
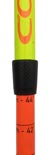
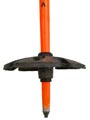
Tip and Basket: The end of a trekking pole features a metal tip with a knurled head. This is designed to create greater friction on rocky surfaces and maintain grip on various terrains. Just a few centimeters above the tip sits the basket. Trekking poles generally come with two basket types: Small and big holed. The smaller diameter basket is for summer and non-snowy terrain, and the wider, holed basket for snow-covered trails.
Each basket can be interchanged depending on season and terrain, as they are screwed on. The summer basket prevents the pole from slipping between rocks or sinking into soft ground. The winter basket helps prevent the pole from sinking too deeply into snow.
How to use them? Here are some tips.
Using trekking poles provides a coordinated, balanced way to hike. The standard technique, similar to Nordic Walking, involves alternating each pole with the opposite leg. As your right leg moves forward, your left arm with the trekking pole moves forward too. This alternating motion creates a fluid, balanced walk, allowing the opposite arm to give a slight push and ease your steps. This technique works best on flat or easy trails where obstacles don’t disrupt your rhythm.
For steeper inclines (around 25° or more), place both trekking poles forward to reduce the load on your legs, allowing for a more efficient and less tiring ascent. Avoid positioning the poles too far forward to prevent excessive forward bending, which can increase effort rather than conserve energy. Keep your torso upright or only slightly bent forward for optimal balance and reduced strain.
When traversing a steep slope, trekking poles are vital for balance. On narrow paths with a steep slope on one side, rely on the uphill pole for stability (e.g., if the slope is to your right, use the right pole for stability). In case of a slip, put weight on this uphill pole to prevent a fall. The downhill pole serves as a counterbalance, helping you maintain an even pace. Use this technique to stay balanced, especially when hiking on steep, uneven paths.